10 octobre 2017
Robe Craie le tuto!
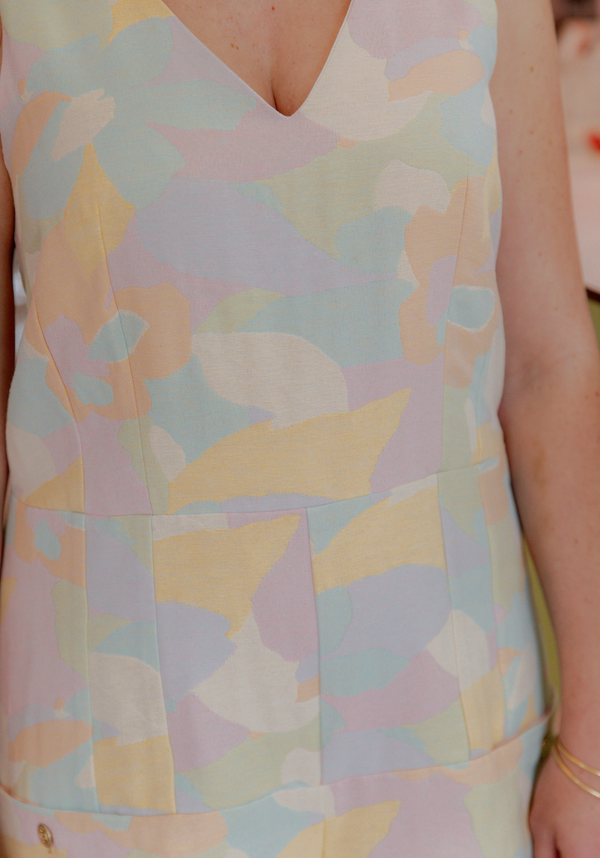
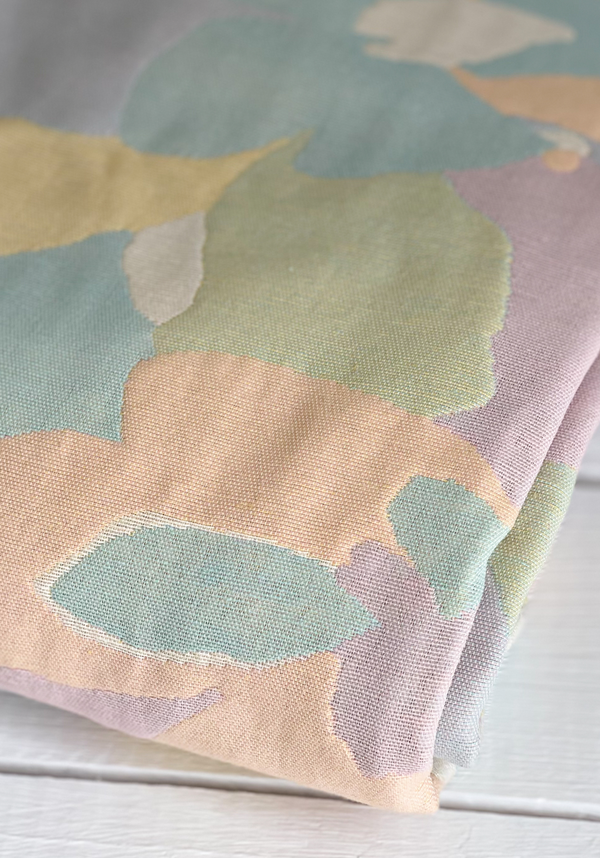
bonjour! je vous présente ici une toute nouvelle version de ma robe Craie, petite dernière de la nouvelle collection. J'ai choisi de la coudre dans un tissu qui rime avec saison froide, la flanelle. Ce tissu vient de chez Printstand, et c'est une surprise que m'a fait Athénais...un grand merci car j'aime beaucoup beaucoup!!!  Le motif a gros pois est très tendance, la tenue du tissu parfaite pour le modèle et surtout il est doux et se porte avec plaisir à même la peau (car ici il fait encore chaud pour sortir en collants). Ce modèle se porte tel quel pour une forme trapèze très confortable, mais vous pouvez aussi ceinturer votre robe (sa longueur et la position des poches s'y prêtant bien).
  Je vous ai déjà expliqué ici la genèse de ce modèle, et le décolleté cœur est vraiment très à propos quand il s'agit de mettre en valeur de jolis bijoux (vous reconnaitrez ici les merveilles de ma copine Ilabella, je ne quitte plus mon sautoir depuis que je l'ai et porté en ras de coup il est aussi absolument canon! Et ces pendants d'oreille...je suis fan que voulez vous).
  Allez c'est parti pour le tutoriel de montage de votre robe: 1.Réalisez vos pinces poitrines sur votre devant tissu (et s'il y a lieu doublure). Reportez d’abord vos pinces depuis votre patron sur votre tissu en marquant avec des crans les côtés de la pince et passez un fil sur la pointe de la pince pour en marquer l’emplacement. Rejoignez le sommet de la pince et les crans avec un marqueur type pilot frixion ou une craie de tailleur (cela forme un triangle). Rabattez les crans de la pince l’un sur l’autre endroit contre endroit, piquez sur votre ligne de tracé et en arrivant sur la pointe de la pince vous continuez de coudre dans le vide sur plusieurs points. Repassez vos pinces vers le bas. Répétez l’opération avec la doublure si vous n’avez pas choisi l’option parementure.


 2.Assemblez par les épaules vos pièces tissu devant et dos en les positionnant endroit contre endroit. Vous faites de même avec les pièces doublure ou parementure devant et dos. Vous noterez que pour une meilleure tenue du décolleté j'ai posé une bande de thermocollant sur le bord de l'encolure de ma parementure. Ouvrez les coutures épaules au fer.

 Venez superposer vos pièces tissu et doublure ou parementure endroit contre endroit, et épinglez tout le long du décolleté uniquement (assemblez sur tout le tour d’encolure).
 Pour vous aider à la couture de la pointe du décolleté, reportez votre ligne de couture et le milieu de votre buste, et suivez bien votre tracé. Quand vous serez à quelques points du « V » raccourcissez votre longueur de point afin de bien atterrir sur votre ligne du milieu. A ce moment-là, gardez l’aiguille plantée, levez le pied et pivotez votre ouvrage pour poursuivre sur la suite du tracé. Crantez bien la pointe de vos découpes et tous vos arrondis et vous diminuez vos marges de couture. Retournez votre travail sur l’endroit.
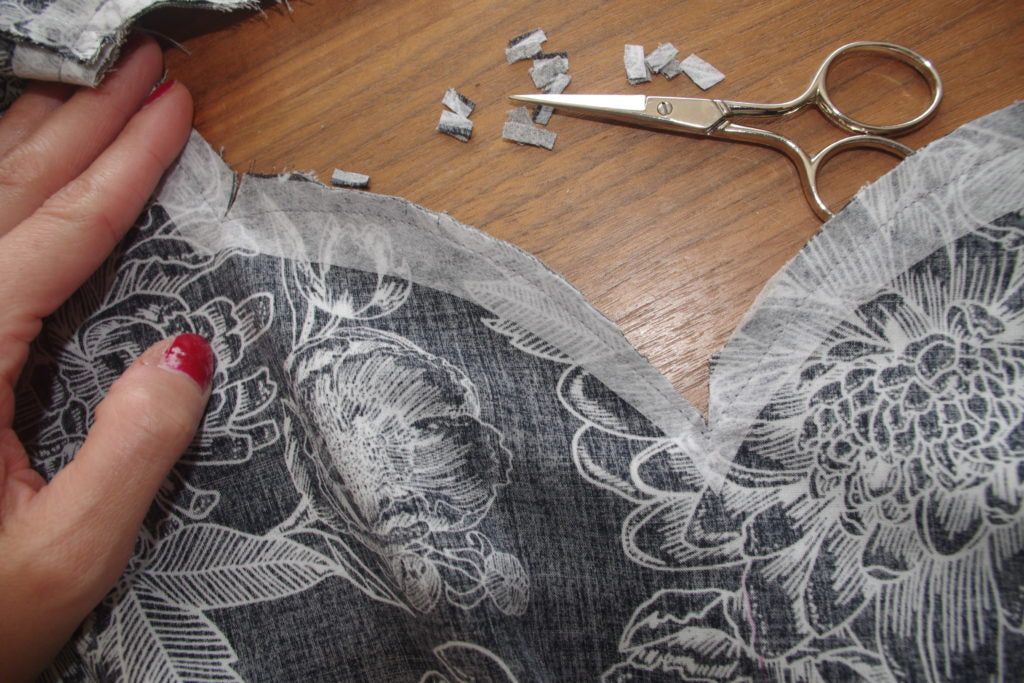
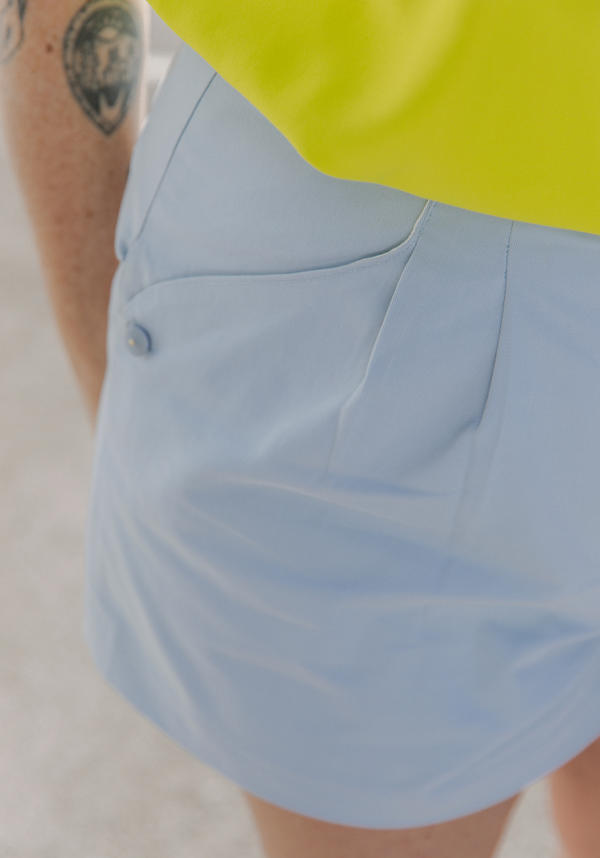
 Repassez bien votre ouvrage afin que vos décolletés devant et dos soient bien définis. Vous obtenez votre robe avec l’endroit de la doublure qui sera contre votre corps et l’endroit tissu qui sera visible. 3.Les poches : positionnez votre fond de poche sur la portion robe devant endroit contre endroit et assemblez. Déployez la poche et repassez bien. Faites de même sur chaque côté de la robe devant ET dos.
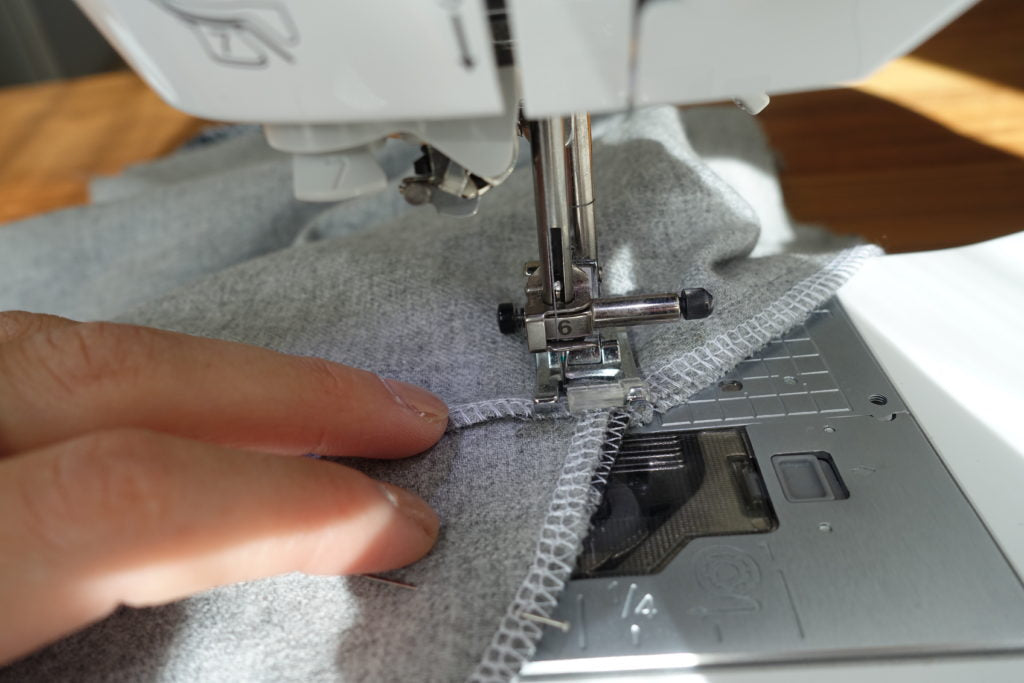
  Assemblage des côtés: épinglez endroit contre endroit par les côtés vos pièces tissu devant et dos poches déployées et cousez en faisant le tour des poches (vous arrêtez la couture en haut de la poche, et aiguille plantée vous soulevez le pied de votre machine et vous pivotez votre ouvrage pour coudre le tour de la poche, en bas de la poche pivotez à nouveau et finissez votre couture en bas de votre robe). Répétez l’opération pour les pièces doublure sans bien entendu l'étape des poches. Pour la parementure cousez les côtés devant et dos endroit contre endroit. Surfilez les bords de vos coutures et plaquez le surplus de couture au fer vers l’arrière.


 Si vous avez choisi l’option parementure, surfilez tout le bas et les côtés de votre parementure. Votre vêtement se présente désormais comme une robe sans manche doublée, tissu et doublure solidarisés par l’encolure. Les manches : Après avoir tracé le repère de votre future fente, venez réaliser une piqure de renfort le long de celle-ci, et coupez entre vos coutures de renfort.
 Sur l’endroit de la manche, épinglez votre bande de biais endroit contre endroit le long de votre couture de renfort, et ouvrez votre fente au maximum pour épingler sur toute la longueur. Cousez.
 Retournez votre bande de biais, et repliez-la x2 afin d’obtenir votre bordure repliée sur l’envers. Aidez-vous du fer à repasser pour modeler et plaquer au mieux votre biais replié. Epinglez et cousez. Attention votre bande de biais doit parfaitement recouvrir votre 1ère couture d’assemblage.
 L’extrémité de votre fente comporte donc le repli du biais : venez renforcer cette zone par un double point à 45 degré.
 Vous pouvez fermer votre manche en réalisant endroit contre endroit la couture latérale. Surfilez.
  A l’aide d’un fil de fronce vous allez venir froncer tout votre bas de manche. Pour se faire : relâchez la tension du fil sur votre machine, rallongez votre point, et changez votre fil de canette pour un fil contrastant. Piquez dans la marge de couture et laissez de la longueur de fil avant de le couper. En tirant sur le fil de canette vous allez venir réaliser des fronces. Leur répartition se fera lors de l’assemblage avec le poignet en vous servant des repères de celui-ci.
  Réalisation du poignet : Thermocollez votre poignet . Pliez endroit contre endroit selon votre ligne de pliure et bien plaquez au fer. Epinglez les extrémités de vos poignets et cousez à 1 cm. Dégarnissez vos angles et retournez votre poignet, repassez bien.
  Assemblage du poignet : épinglez votre poignet endroit contre endroit sur votre manche (le cran poignet va sur la portion avant de la fente indéchirable ainsi cette zone dépasse) : votre pièce comporte des crans de repère pour vous aider à la positionner: votre patte de boutonnage va donc au-delà de votre manche (la portion la plus longue sera celle qui supportera votre boutonnière, elle vient donc se positionner au dessus de la zone en continuité de votre fente poignet quand vous fermez). Epinglez bien et cousez puis retournez votre poignet. Repliez votre rentré de couture à l’intérieur de votre poignet, et venez fixer avec une couture qui sera visible le long de votre poignet.


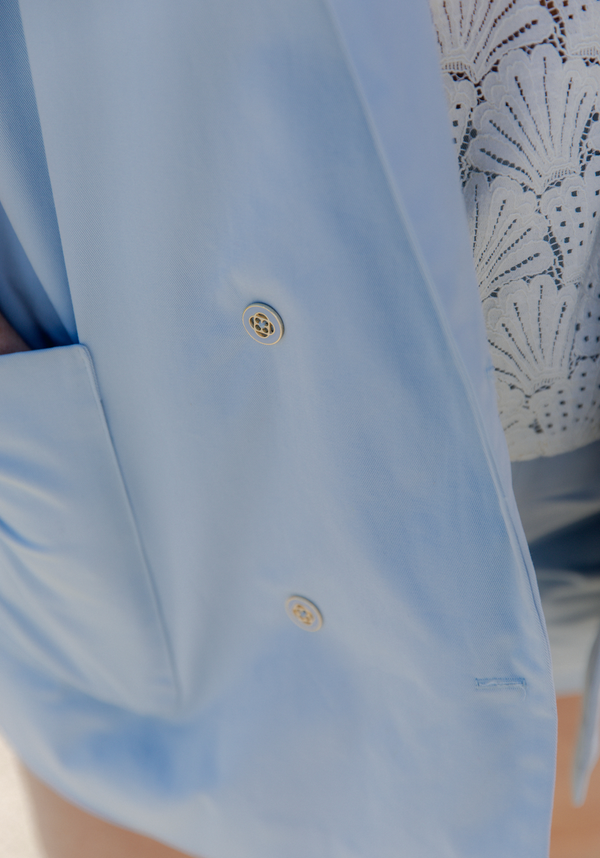
 Réalisez vos boutonnières et cousez vos boutons. Vous allez venir monter votre manche sur votre vêtement en épinglant endroit contre endroit (utilisez bien vos crans de montage, 2 devant 1 au dos, et 1 cran pour la tête de manche qui répond à la couture de l’épaule). Vous aurez donc 3 épaisseurs: parementure, tissu corps et manche.Surfilez votre couture.
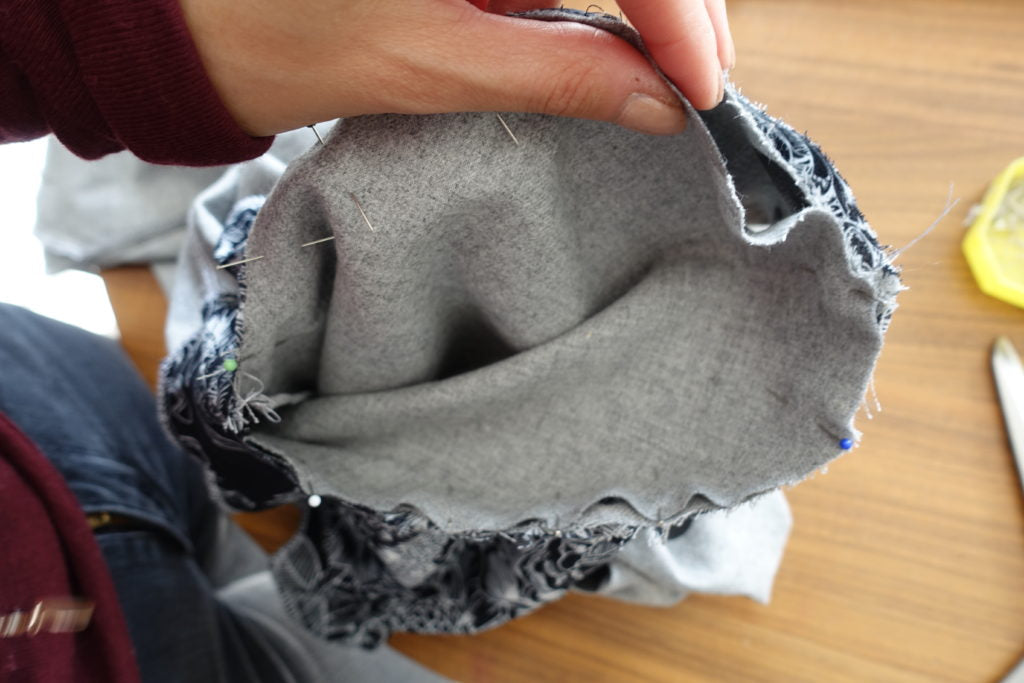
 Les finitions : Cousez votre ourlet du bas de votre robe en réalisant un ourlet invisible à la main ou à l’aide de votre machine à coudre. Si vous avez choisi de coudre une doublure faites un ourlet qui permette que votre doublure soit un peu plus courte, cela évitera qu’elle ne dépasse et ne se voit. Et bien félicitations, vous pouvez enfiler votre robe Craie, boutonnez vos jolis poignets, et surtout profitez !
Le motif a gros pois est très tendance, la tenue du tissu parfaite pour le modèle et surtout il est doux et se porte avec plaisir à même la peau (car ici il fait encore chaud pour sortir en collants). Ce modèle se porte tel quel pour une forme trapèze très confortable, mais vous pouvez aussi ceinturer votre robe (sa longueur et la position des poches s'y prêtant bien). Je vous ai déjà expliqué ici la genèse de ce modèle, et le décolleté cœur est vraiment très à propos quand il s'agit de mettre en valeur de jolis bijoux (vous reconnaitrez ici les merveilles de ma copine Ilabella, je ne quitte plus mon sautoir depuis que je l'ai et porté en ras de coup il est aussi absolument canon! Et ces pendants d'oreille...je suis fan que voulez vous). Allez c'est parti pour le tutoriel de montage de votre robe: 1.Réalisez vos pinces poitrines sur votre devant tissu (et s'il y a lieu doublure). Reportez d’abord vos pinces depuis votre patron sur votre tissu en marquant avec des crans les côtés de la pince et passez un fil sur la pointe de la pince pour en marquer l’emplacement. Rejoignez le sommet de la pince et les crans avec un marqueur type pilot frixion ou une craie de tailleur (cela forme un triangle). Rabattez les crans de la pince l’un sur l’autre endroit contre endroit, piquez sur votre ligne de tracé et en arrivant sur la pointe de la pince vous continuez de coudre dans le vide sur plusieurs points. Repassez vos pinces vers le bas. Répétez l’opération avec la doublure si vous n’avez pas choisi l’option parementure. 2.Assemblez par les épaules vos pièces tissu devant et dos en les positionnant endroit contre endroit. Vous faites de même avec les pièces doublure ou parementure devant et dos. Vous noterez que pour une meilleure tenue du décolleté j'ai posé une bande de thermocollant sur le bord de l'encolure de ma parementure. Ouvrez les coutures épaules au fer. Venez superposer vos pièces tissu et doublure ou parementure endroit contre endroit, et épinglez tout le long du décolleté uniquement (assemblez sur tout le tour d’encolure). Pour vous aider à la couture de la pointe du décolleté, reportez votre ligne de couture et le milieu de votre buste, et suivez bien votre tracé. Quand vous serez à quelques points du « V » raccourcissez votre longueur de point afin de bien atterrir sur votre ligne du milieu. A ce moment-là, gardez l’aiguille plantée, levez le pied et pivotez votre ouvrage pour poursuivre sur la suite du tracé. Crantez bien la pointe de vos découpes et tous vos arrondis et vous diminuez vos marges de couture. Retournez votre travail sur l’endroit. Repassez bien votre ouvrage afin que vos décolletés devant et dos soient bien définis. Vous obtenez votre robe avec l’endroit de la doublure qui sera contre votre corps et l’endroit tissu qui sera visible. 3.Les poches : positionnez votre fond de poche sur la portion robe devant endroit contre endroit et assemblez. Déployez la poche et repassez bien. Faites de même sur chaque côté de la robe devant ET dos. Assemblage des côtés: épinglez endroit contre endroit par les côtés vos pièces tissu devant et dos poches déployées et cousez en faisant le tour des poches (vous arrêtez la couture en haut de la poche, et aiguille plantée vous soulevez le pied de votre machine et vous pivotez votre ouvrage pour coudre le tour de la poche, en bas de la poche pivotez à nouveau et finissez votre couture en bas de votre robe). Répétez l’opération pour les pièces doublure sans bien entendu l'étape des poches. Pour la parementure cousez les côtés devant et dos endroit contre endroit. Surfilez les bords de vos coutures et plaquez le surplus de couture au fer vers l’arrière. Si vous avez choisi l’option parementure, surfilez tout le bas et les côtés de votre parementure. Votre vêtement se présente désormais comme une robe sans manche doublée, tissu et doublure solidarisés par l’encolure. Les manches : Après avoir tracé le repère de votre future fente, venez réaliser une piqure de renfort le long de celle-ci, et coupez entre vos coutures de renfort. Sur l’endroit de la manche, épinglez votre bande de biais endroit contre endroit le long de votre couture de renfort, et ouvrez votre fente au maximum pour épingler sur toute la longueur. Cousez. Retournez votre bande de biais, et repliez-la x2 afin d’obtenir votre bordure repliée sur l’envers. Aidez-vous du fer à repasser pour modeler et plaquer au mieux votre biais replié. Epinglez et cousez. Attention votre bande de biais doit parfaitement recouvrir votre 1ère couture d’assemblage. L’extrémité de votre fente comporte donc le repli du biais : venez renforcer cette zone par un double point à 45 degré. Vous pouvez fermer votre manche en réalisant endroit contre endroit la couture latérale. Surfilez. A l’aide d’un fil de fronce vous allez venir froncer tout votre bas de manche. Pour se faire : relâchez la tension du fil sur votre machine, rallongez votre point, et changez votre fil de canette pour un fil contrastant. Piquez dans la marge de couture et laissez de la longueur de fil avant de le couper. En tirant sur le fil de canette vous allez venir réaliser des fronces. Leur répartition se fera lors de l’assemblage avec le poignet en vous servant des repères de celui-ci. Réalisation du poignet : Thermocollez votre poignet . Pliez endroit contre endroit selon votre ligne de pliure et bien plaquez au fer. Epinglez les extrémités de vos poignets et cousez à 1 cm. Dégarnissez vos angles et retournez votre poignet, repassez bien. Assemblage du poignet : épinglez votre poignet endroit contre endroit sur votre manche (le cran poignet va sur la portion avant de la fente indéchirable ainsi cette zone dépasse) : votre pièce comporte des crans de repère pour vous aider à la positionner: votre patte de boutonnage va donc au-delà de votre manche (la portion la plus longue sera celle qui supportera votre boutonnière, elle vient donc se positionner au dessus de la zone en continuité de votre fente poignet quand vous fermez). Epinglez bien et cousez puis retournez votre poignet. Repliez votre rentré de couture à l’intérieur de votre poignet, et venez fixer avec une couture qui sera visible le long de votre poignet. Réalisez vos boutonnières et cousez vos boutons. Vous allez venir monter votre manche sur votre vêtement en épinglant endroit contre endroit (utilisez bien vos crans de montage, 2 devant 1 au dos, et 1 cran pour la tête de manche qui répond à la couture de l’épaule). Vous aurez donc 3 épaisseurs: parementure, tissu corps et manche.Surfilez votre couture. Les finitions : Cousez votre ourlet du bas de votre robe en réalisant un ourlet invisible à la main ou à l’aide de votre machine à coudre. Si vous avez choisi de coudre une doublure faites un ourlet qui permette que votre doublure soit un peu plus courte, cela évitera qu’elle ne dépasse et ne se voit. Et bien félicitations, vous pouvez enfiler votre robe Craie, boutonnez vos jolis poignets, et surtout profitez !